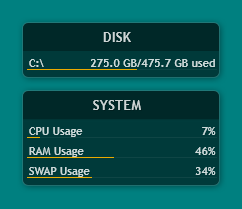
Rainmeter is a very useful desktop customization tool for Windows. With this tool you can add 'meters' to your desktop, which can display all kinds of measurements. I used it for many years to display some basic stats of my machine, like CPU and disk space usage (see Fig 1). For that I used the default skin: illustro.
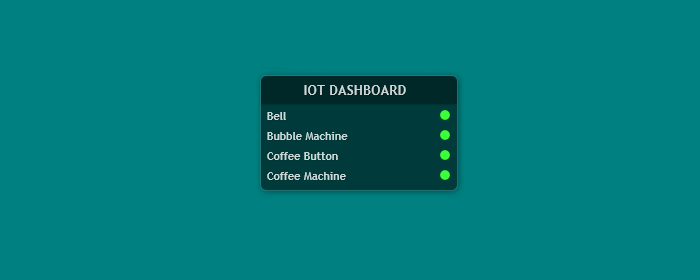
I wanted Rainmeter to show me the current state of my IoT devices that are connected to my MQTT broker. Additionaly, I wanted the skin to look nicely and fit in with my current setup.
After doing some Googling, I found that nothing like this was available on the internet. However, there was an MQTT plugin for Rainmeter! With that it'd be easy to build something like this.
In this blogpost I'll briefly explain how I built this skin.
UPDATE: I implemented publishing.
Setup
My devices are all connected to an MQTT broker. If a device is connected, it sends 1 to a certain topic. If a device disconnects, it sends 0 using a so-called last will message. All messages are retained. So, if a device is connected we should receive 1, and 0 otherwise. Similarly, I can retrieve the state of the device; whether it is active or not. I implemented four states:
- Unknown (greyish): there is no connection to the MQTT broker
- Offline (red): the device is off
- Online (green): the device is on
- Active (blue): the device is active
MqttClientPlugin
To show these stats, Rainmeter needs to establish a connnection to the broker. For this purpose, I used the MqttClientPlugin. I cloned the repository and then built the solution using Visual Studio 2019 (as explained in the ReadMe).
When building the plugin, I encoutered the following error:
The command ""C:\Users\josjr\ownCloud\Lenovo\Documenten\Visual Studio 2019\Projects\MqttClientPlugin\API\DllExporter.exe" Debug x64 C:\Users\josjr\ownCloud\Lenovo\Documenten\Visual Studio 2019\Projects\MqttClientPlugin\bin\Debug\x64\ MqttClient.dll" exited with code -532462766. MqttClientPlugin
To solve this I changed the Post-build event commandline setting (Properties > Build Events) to the following:
taskkill /f /fi "imagename eq Rainmeter.exe"
"$(SolutionDir)API\DllExporter.exe" "$(ConfigurationName)" "$(PlatformName)" "$(TargetDir)\" "$(TargetFileName)"
xcopy  "$(TargetDir)$(TargetFileName)" "%appdata%\Rainmeter\Plugins" /Y
Which does (1) kill the current Rainmeter process, (2) creates the plugin without errors and (3) copies the plugin (.DLL) to the right Rainmeter folder.
Create a Skin
Since I wanted my skin to look like the default skins, I started by editing the System.ini file. I also copied the @Resources folder, which contains the background image.
Without going into full detail as to how Rainmeter configuration files (skins) work (their documentation is excellent!), such a file contains a Rainmeter / Metadata / Variables section. The first two contain general information about the skin and the third contains all variables. A variable can then be accessed throughout the file like follows: #variablename#
This constitutes the first part of the file:
[Rainmeter]
Update=1000
Background=#@#Background.png
BackgroundMode=3
BackgroundMargins=0,34,0,14

[Metadata]
Name=Connections
Author=Jos Zuijderwijk, based on illustro (poiru)
Information=Displays whether IoT devices are currently connected.
Version=1.0
License=Creative Commons Attribution - Non - Commercial - Share Alike 3.0

[Variables]
fontName=Trebuchet MS
textSize=8
; Used colors
colorText=255,255,255,205
colorOnline=60,255,60,255
colorOffline=255,60,60,255
colorDisabled=105,105,105,105
colorActive=60,60,255,255
; States
stateBell=#colorDisabled#
stateCoffee=#colorDisabled#
stateCoffeeButton=#colorDisabled#
stateBubble=#colorDisabled#
isConnected=0
The state variables (e.g. stateBell) refer to the current color of the indicators in the widget, as decribed in Setup.
MQTT Meters
The interesting part are the dynamic meters. A meter is a Rainmeter component that shows data, e.g. a label. A measure is the data that a meter displays, e.g. text. We first have to create measures. Those can be acquired using the plugin. You can find the configuration for the plugin below.
[mqttServer]
Measure=Plugin
Plugin=MqttClient
Server= ; TODO: fill in
Port=1883
Username= ; TODO: fill in
Password= ; TODO: fill in
; Update the meter when the client (dis)connects:
OnConnect=[!SetVariable isConnected 1][!Update][!Redraw]
OnDisconnect=[!SetVariable isConnected 0][!Update][!Redraw]
; Update the meter as soon as a message arrives:
OnMessage=[!Update][!Redraw]
Let's define a measure for the bell (this bell, in case you're wondering). We need to refer to mqttServer, define the subscription topic and make sure that the bellState changes according to the received message.
For some reason DynamicVariables=1 doesn't work well with the MQTT plugin measures, so I added this as a workaround:
[ConnectionMeasure]
Measure=Calc
Formula=#isConnected#
DynamicVariables=1
Now we can use isConnected dynamically in this section:
[mqttTopicBell]
Measure=Plugin
Plugin=MqttClient
ParentName=mqttServer
Topic=connection/bell

; This section changes the state
IfCondition = (mqttTopicBell = 1)
IfTrueAction = [!SetVariable stateBell #colorOnline#]
IfFalseAction = [!SetVariable stateBell  #colorOffline]

IfCondition2 = (ConnectionMeasure = 0)
IfTrueAction2 = [!SetVariable stateBell  #colorDisabled#]
IfConditionMode=1
The bell doesn't have an 'active' state, but that could be implemented analagously (in a new section if you subscribe to another topic).
Now we have a measure, we can display it with a meter. That's done as follows:
[meterBell]
Meter=String
MeterStyle=styleLeftText
X=10
Y=40
W=190
H=14
Text=Bell

[meterBellValue]
Meter=Shape
Shape=Ellipse 0,5,5 | Fill Color #stateBell# | StrokeWidth 0.5 | Stroke Color 0,0,0,60
X = 190
Y = 0r
DynamicVariables=1
The first section describes the title label ("Bell"), and the second section generates the little indication bullet that changes color. It is important to include DynamicVariables=1, otherwise it won't work.
Now we've got a working example of a dashboard with only one device, it's very easy to expand it with other devices.
Result
This is the result! You can find the full code in my fork of MqttClientPlugin.
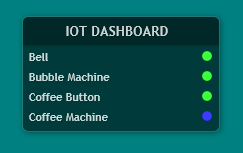
The coffee machine is active 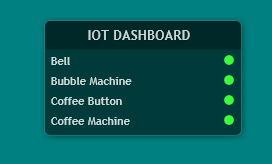
All devices are online 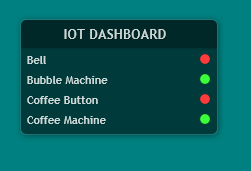
Some devices are online 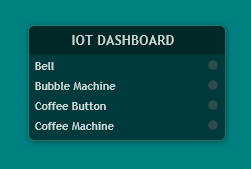
There's no connection to the broker
3 thoughts on “iot-dash: A Rainmeter Skin”