Smart Traffic Light 3: Full version
Building a Full-Size Smart Traffic Light.


We’ve previously set up an IoT Framework and created a prototype traffic light. Now, let’s take it to the next level by building a full-size traffic light that displays our rowing club’s current rowing ban status. This upgraded version will feature:
- Various animations, including a party mode
- Web app control
- Manual control via a physical button
Manual (Dutch)
De handleiding voor Orca vind je hier.
Hardware
Components
For this project, we’ll need:
- 1x Full-size traffic light
- 1x NodeMCU V3 (or similar)
- 3x Relay modules
- 1x HLK-PM01 AC-DC Power supply
- 1x Push button
- 1x Power switch
- 1x Junction box
- Installation wire
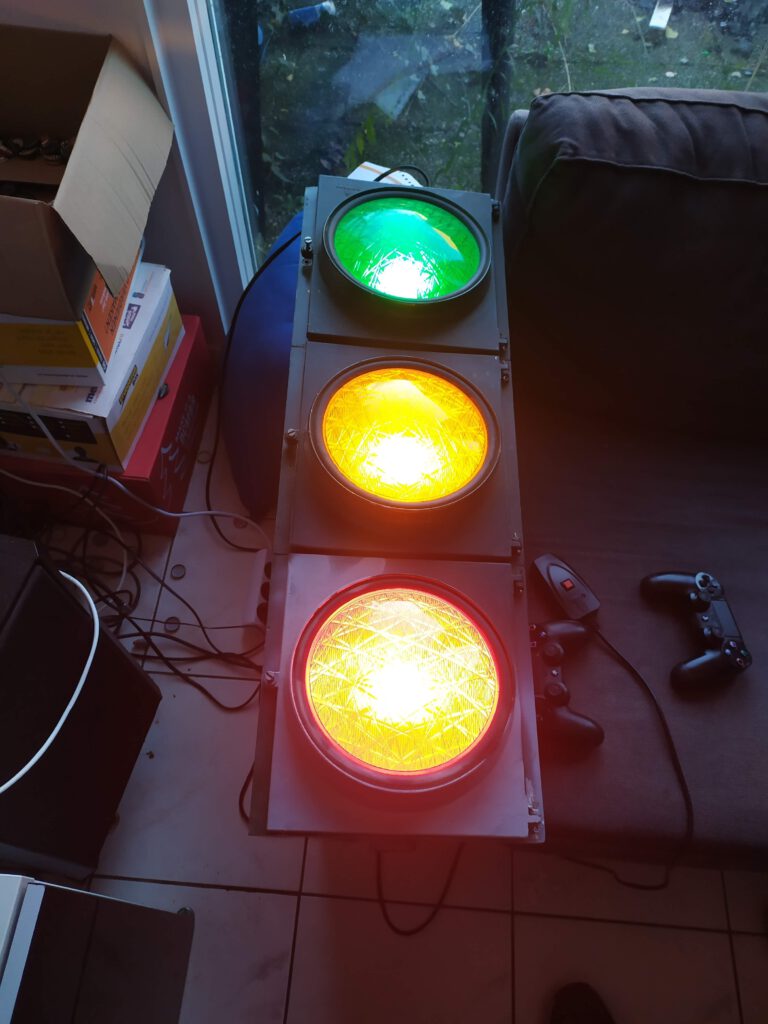
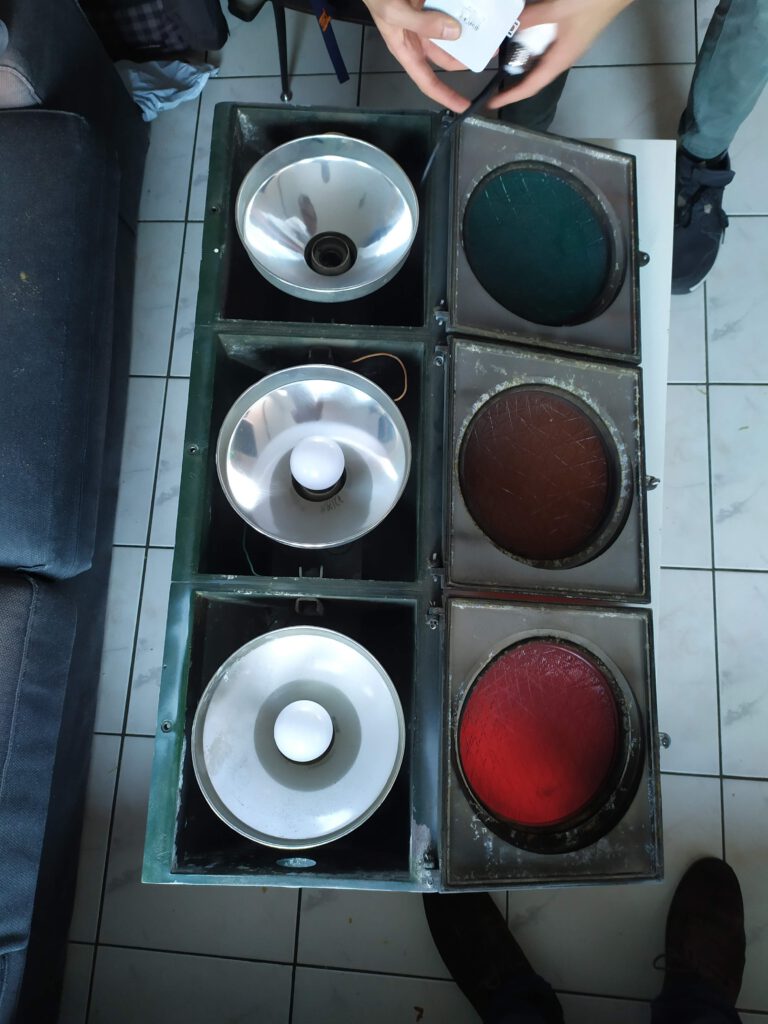
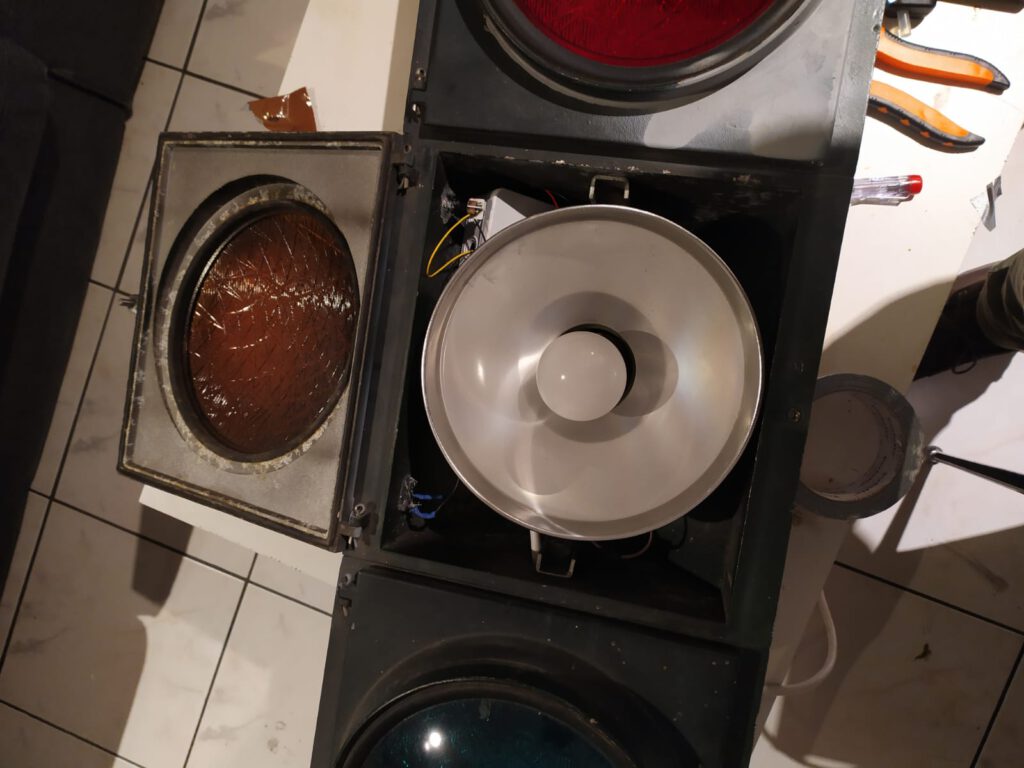
I bought a full size traffic light via Marktplaats (similar to Ebay) for €110. After swapping out the old bulbs for LEDs, it was ready for its smart makeover.
Controlling the Lights
You’ll probably find that the lights of your traffic light are wired in such a way that all lights turn on when you give it power. To be able to have some control over the individual lights instead of them all turning on at once, we’ll use a microcontroller (NodeMCU) and relay modules. It’s all very similar to the way we designed our prototype, although instead of addressing our LEDs directly, we’ll be using a relay.
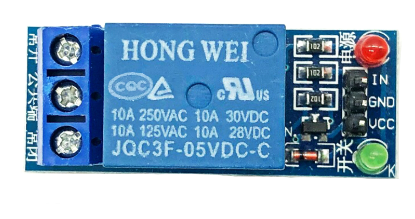
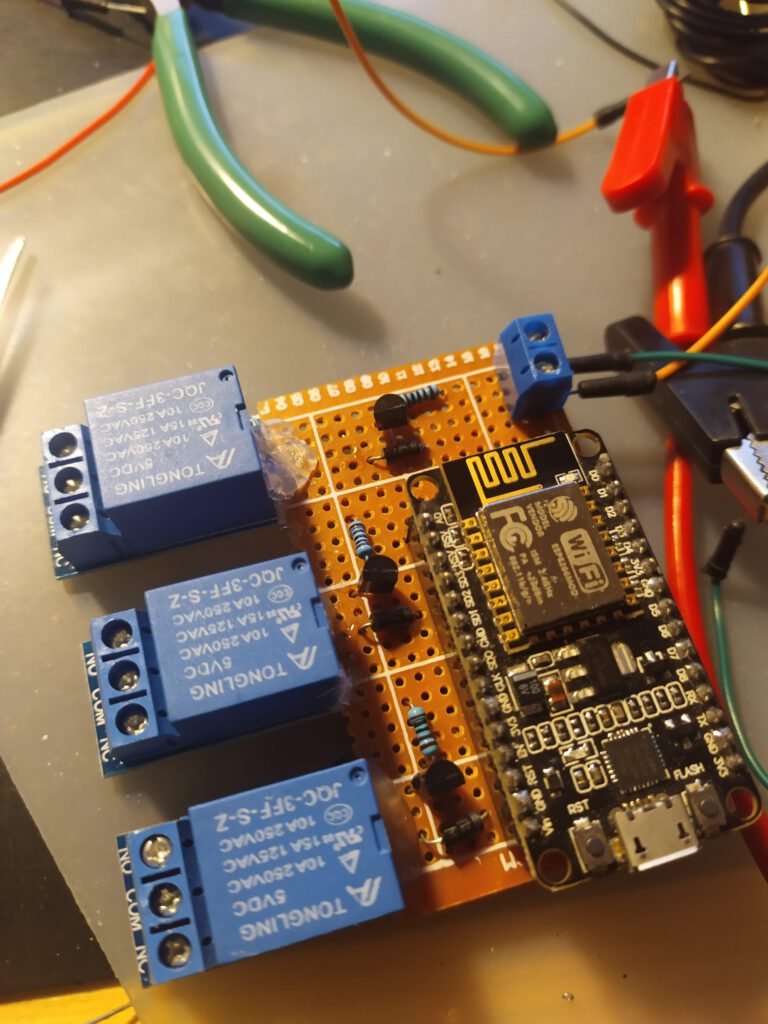
The relay module we use accepts an input (0V LOW - 5V HIGH) that is sent by our microcontroller. If you pull the input pin (IN) high, the terminals NO (normaly open) and COM (common) will be connected, while COM and NC (normally closed) will be connected if the input pin is low. The labels on the PCB might be in Chinese (see Figure 2) so make sure you use a multimeter to check the terminals.
We connected everything according to the wiring diagram below (that includes the power switch and control button). This setup gives us fine-grained control over each light. The microcontroller gets its 5V from the HiLink supply.

Controller
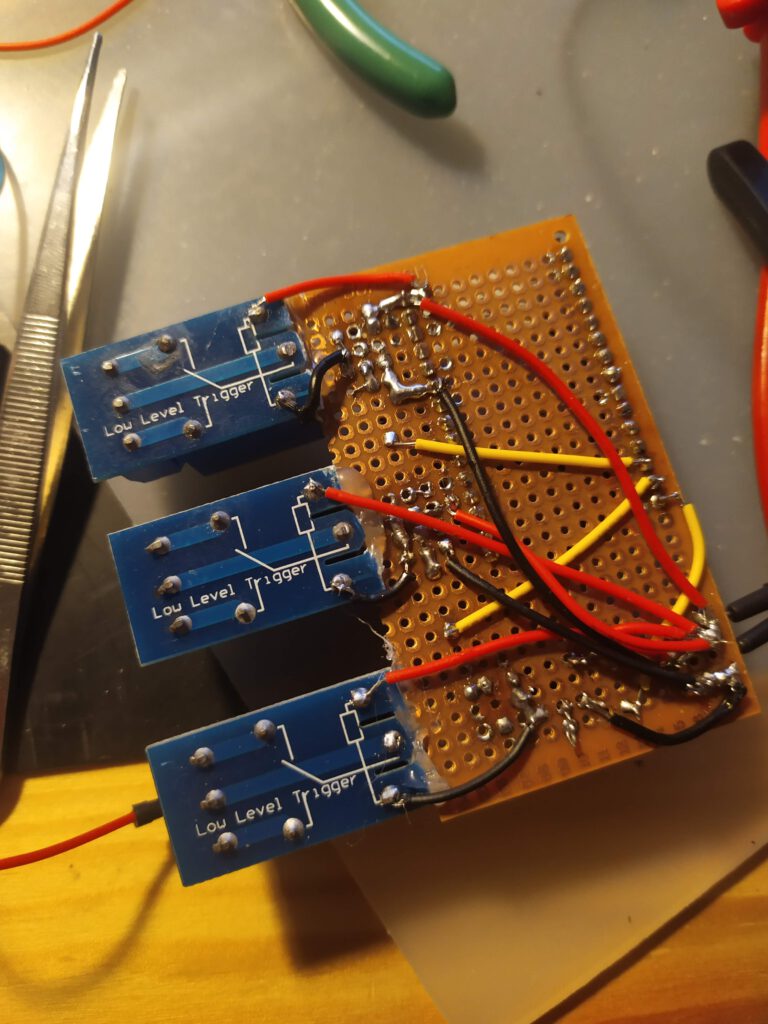
I wanted to have the NodeMCU and the relay boards all on one perf board. But the male header pins of the relay boards faced upwards so I desoldered them and reinstalled them the other way around.
That didn’t go well… The new pins didn’t work and I practically ruined all of my relay boards. Since I didn’t want to wait for new ones, I decided to get rid of all of the control logic on the module and recreate it myself. For that purpose I used a standard BC547 transistor with a 1K ohm resistor and a 1N4007 flyback diode.
I made it unnecessarily difficult for myself in the first place by insisting on placing all the components on one board. It’s a whole lot easier to just glue the relay boards directly into the junction box. But I couldn’t go back as I hadn’t any spare parts laying around, so I glued the relay components to the board. The final result looked like this:
The push button is connected to a GPIO and GND. Using the internal pull-up (this is done in code) we can detect whether the button is pressed.
The Lights
With the controller sorted, my friend Marte wired up the lights according to our schematic. We then carefully inserted the microcontroller into the junction box. It was a tight fit, but we managed to connect all the wires.
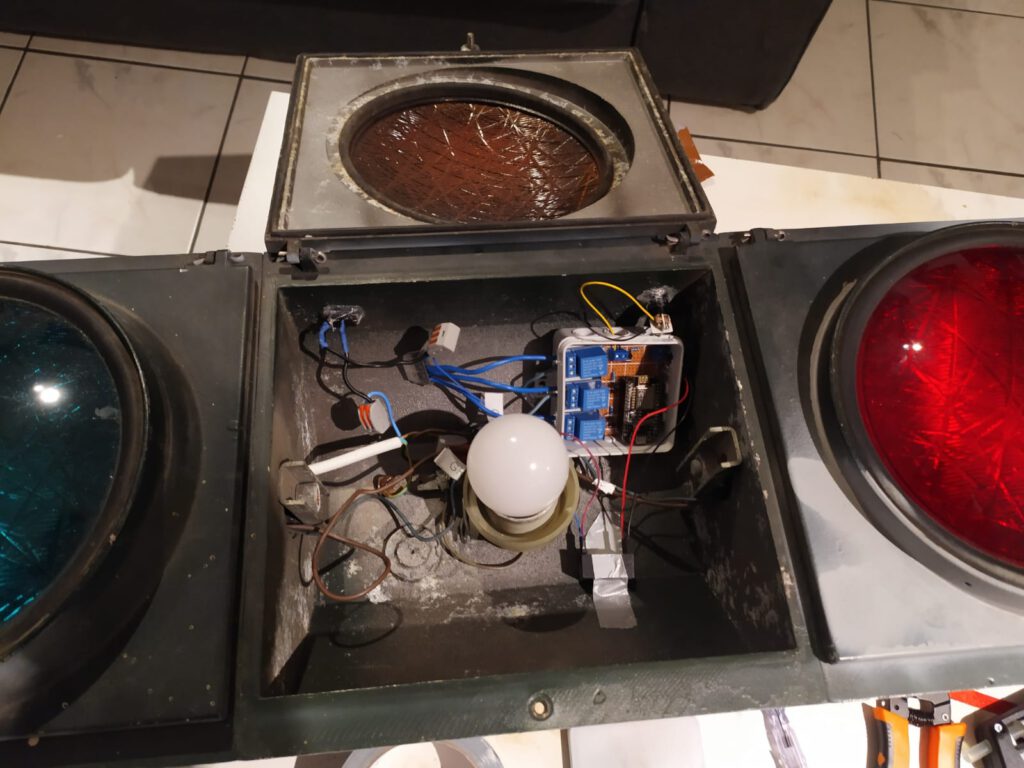
As you can see, the Hi-Link AC-DC module is placed outside of the box (with the use of some good ol’ duct tape). This is definitely not the ideal way to attach the module to the case, but the traffic light is not intended for outdoor use anyway.
Aaaaaaaaand it works! Admittedly not after one try… I accidently swapped the green and the red light, so I had to fix that programmatically.
Software
Now we got the hardware part out of the way, we still needed software to drive the traffic light.
The traffic light has the following features:
- Current rowing ban display (rowing ban mode)
- Various animations
- Manual and remote control
- Over-the-air (OTA) firmware updates
- WiFi configuration via WiFiManager
- Time-based on/off scheduling
- Toggle green light to save energy
I already discussed and implemented some of these feature in the prototype (MQTT connection, WiFi manager, some animations). In this post I’ll focus on the new features.
The full source code for driving the traffic light is available on GitHub.
Animations
Since the traffic light is placed inside, I wanted to add animation effects so that it could be used while partying or as a decorative light. I included the following animations:
- Party mode (flashy animation)
- Random mode (lights turn on/off randomly)
- Off mode (all lights off)
- On mode (all lights on)
I implemented the animations as a nested array of booleans, each representing the state of one light. Here’s a snippet of how I implemented the random animation:
void randomAnimation(){
  int r = random(8) + 1;
  setLights(r % 2, r % 3, r % 4);
}
Note that in the implementation above at least one light is always on.
Manual control
A big red push button on the side allows users to interact with the traffic light:
- Short press: Toggles the green light in ‘rowing ban mode’
- Long press: Enters ‘animation mode’, allowing users to cycle through animations.
Remote control
I built a simple dashboard using Node-RED for remote access and added a timer function for scheduling. It’s generally a good idea to make your devices modular to allow for future expansion of functionality.

OTA Updates
Taking apart the whole thing for a software update is a very tedious task. Luckily we have Over The Air (OTA) updates. This practically means that you can upload new firmware through WiFi to your microcontroller.
For that purpose, I used this Node-RED flow (modified) together with this library. The latter makes it possible to send a HTTP request to an update server (our Node-RED server!) to ask whether an update is available. It sends its current firmware version that is hardcoded. If the server version is higher, the server will respond with the firmware update. Note that the WiFiClientSecure library is needed when requesting updates from a HTTPS server.
Now, to be able to update OTA, you have to trigger the update check. I added an MQTT topic (vvb/update) that leads to the device checking for updates whenever a message is sent to it.
I added the logic for checking the right name of the firmware and the MQTT topic that serves as the update topic (this could also be achieved by specifying the firmware name into a single, defined update topic). This makes it possible to update multiple devices running different firmware. Note that it is also possible to update multiple devices running the same firmware. The JSON file below is an example of a configuration file that I use for the OTA system.
{
   "settings":[
      {
         "name":"stoplicht",
         "topic":"vvb/update",
         "latest":{
            "version":"1.0",
            "file":"/data/firmware/stoplicht/stoplicht_1.0.bin"
         }
      }
   ]
}
So, if you want to roll out a firmware update, it’s as easy as doing the following steps:
- Compile the source code to a .bin file
- Upload the .bin file to the destined folder on your server
- Edit the JSON file and also upload it to your server
- Trigger the updater of the traffic light
Steps 2 and 3 could be automated by adding a file uploader to the update system. The full flow is included below.
[{"id":"e9377d19.816dc","type":"http in","z":"f6336577.1bc9f8","name":"Receive Update Request","url":"update","method":"get","upload":false,"swaggerDoc":"","x":130,"y":320,"wires":[["8551578f.8af5d8","a1ae8f2d.f63a1"]]},{"id":"30fd7c07.857824","type":"mqtt out","z":"f6336577.1bc9f8","name":"Update message","topic":"","qos":"1","retain":"true","broker":"e7ca3249.6ee4f","x":1070,"y":200,"wires":[]},{"id":"44277341.eff32c","type":"inject","z":"f6336577.1bc9f8","name":"Trigger update","props":[{"p":"name","v":"stoplicht","vt":"str"}],"repeat":"","crontab":"","once":false,"onceDelay":0.1,"topic":"","x":120,"y":160,"wires":[["eb57067c.d5d248"]]},{"id":"8551578f.8af5d8","type":"switch","z":"f6336577.1bc9f8","name":"Check user agent","property":"req.headers.user-agent","propertyType":"msg","rules":[{"t":"neq","v":"ESP8266-http-Update","vt":"str"},{"t":"else"}],"checkall":"false","repair":false,"outputs":2,"x":390,"y":320,"wires":[["68f30d59.fc2a84"],["ff42fb92.516148"]]},{"id":"68f30d59.fc2a84","type":"change","z":"f6336577.1bc9f8","name":"Forbidden","rules":[{"t":"set","p":"statusCode","pt":"msg","to":"403","tot":"str"},{"t":"set","p":"payload","pt":"msg","to":"Forbidden","tot":"str"}],"action":"","property":"","from":"","to":"","reg":false,"x":1040,"y":320,"wires":[["132eb487.bc16fb"]]},{"id":"132eb487.bc16fb","type":"http response","z":"f6336577.1bc9f8","name":"Response","statusCode":"","headers":{},"x":1340,"y":360,"wires":[]},{"id":"ee2df76.ef08808","type":"change","z":"f6336577.1bc9f8","name":"No Update","rules":[{"t":"set","p":"statusCode","pt":"msg","to":"304","tot":"str"}],"action":"","property":"","from":"","to":"","reg":false,"x":1050,"y":360,"wires":[["132eb487.bc16fb"]]},{"id":"9894e289.9dab4","type":"file in","z":"f6336577.1bc9f8","name":"Load Firmware","filename":"","format":"","sendError":false,"x":1000,"y":500,"wires":[["b4cc75ad.14d338"]]},{"id":"70aba325.bf515c","type":"catch","z":"f6336577.1bc9f8","name":"File error","scope":["9894e289.9dab4"],"uncaught":false,"x":1040,"y":420,"wires":[["1b28cf87.fcf9e","ee2df76.ef08808"]]},{"id":"1b28cf87.fcf9e","type":"debug","z":"f6336577.1bc9f8","name":"Firmware file error","active":true,"tosidebar":true,"console":false,"tostatus":false,"complete":"error","targetType":"msg","statusVal":"","statusType":"auto","x":1370,"y":440,"wires":[]},{"id":"ff42fb92.516148","type":"file in","z":"f6336577.1bc9f8","name":"Load settings","filename":"/data/firmware/settings.json","format":"utf8","sendError":false,"x":490,"y":400,"wires":[["d019f6b2.34a7a8"]]},{"id":"d019f6b2.34a7a8","type":"json","z":"f6336577.1bc9f8","name":"","property":"payload","action":"","pretty":false,"x":630,"y":400,"wires":[["452789ce.c201f8"]]},{"id":"eb57067c.d5d248","type":"file in","z":"f6336577.1bc9f8","name":"Load settings","filename":"/data/firmware/settings.json","format":"utf8","sendError":false,"x":290,"y":160,"wires":[["a0ecf9f0.626ef8"]]},{"id":"a0ecf9f0.626ef8","type":"json","z":"f6336577.1bc9f8","name":"","property":"payload","action":"","pretty":false,"x":430,"y":160,"wires":[["e165242f.f922f8"]]},{"id":"8f069645.1a3b58","type":"comment","z":"f6336577.1bc9f8","name":"","info":"Vergeet niet in te stellen welke firmware er moet worden geüpdatet!\n\nNeem bij vragen contact op met [Jos Zuijderwijk](mailto:hoi@joszuijderwijk.nl).","x":110,"y":120,"wires":[]},{"id":"e165242f.f922f8","type":"function","z":"f6336577.1bc9f8","name":"find fw data","func":"for (var i in msg.payload.settings){\n var item = msg.payload.settings[i]\n if (item.name == msg.name){\n msg.payload = item;\n return msg;\n }\n}\n\n// not found! error\nmsg.payload = \"404\";\nreturn msg;","outputs":1,"noerr":0,"initialize":"","finalize":"","x":590,"y":160,"wires":[["f1531d6a.0657d"]]},{"id":"f1531d6a.0657d","type":"switch","z":"f6336577.1bc9f8","name":"found?","property":"payload","propertyType":"msg","rules":[{"t":"eq","v":"404","vt":"str"},{"t":"else"}],"checkall":"true","repair":false,"outputs":2,"x":730,"y":160,"wires":[["cc91223e.9aec2"],["baa0a8e0.734d98"]]},{"id":"cc91223e.9aec2","type":"debug","z":"f6336577.1bc9f8","name":"Not found!","active":false,"tosidebar":true,"console":false,"tostatus":false,"complete":"true","targetType":"full","statusVal":"","statusType":"auto","x":890,"y":120,"wires":[]},{"id":"baa0a8e0.734d98","type":"change","z":"f6336577.1bc9f8","name":"","rules":[{"t":"set","p":"topic","pt":"msg","to":"payload.topic","tot":"msg"},{"t":"set","p":"payload","pt":"msg","to":"payload.latest.version","tot":"msg"}],"action":"","property":"","from":"","to":"","reg":false,"x":880,"y":200,"wires":[["30fd7c07.857824"]]},{"id":"452789ce.c201f8","type":"function","z":"f6336577.1bc9f8","name":"check fw data","func":"var fw = JSON.parse(msg.req.headers[\"x-esp8266-version\"]);\n\nfor (var i in msg.payload.settings){\n var item = msg.payload.settings[i]\n if (item.name == fw.name){\n \n //check version\n if (item.version == fw.version){\n msg.payload = \"304\";\n return msg;\n }else{\n msg.filename = item.latest.file;\n msg.req = fw;\n return msg;\n }\n\n }\n}\n\n// not found! error\nmsg.payload = \"404\";\nreturn msg;","outputs":1,"noerr":0,"initialize":"","finalize":"","x":620,"y":460,"wires":[["6664c2.0ab02b4"]]},{"id":"6664c2.0ab02b4","type":"switch","z":"f6336577.1bc9f8","name":"check version","property":"payload","propertyType":"msg","rules":[{"t":"eq","v":"404","vt":"str"},{"t":"eq","v":"304","vt":"str"},{"t":"else"}],"checkall":"true","repair":false,"outputs":3,"x":840,"y":400,"wires":[["ee2df76.ef08808"],["ee2df76.ef08808"],["9894e289.9dab4"]]},{"id":"b4cc75ad.14d338","type":"change","z":"f6336577.1bc9f8","name":"Update!","rules":[{"t":"set","p":"statusCode","pt":"msg","to":"200","tot":"str"}],"action":"","property":"","from":"","to":"","reg":false,"x":1160,"y":500,"wires":[["132eb487.bc16fb"]]},{"id":"a1ae8f2d.f63a1","type":"debug","z":"f6336577.1bc9f8","name":"","active":true,"tosidebar":true,"console":false,"tostatus":false,"complete":"true","targetType":"full","statusVal":"","statusType":"auto","x":340,"y":260,"wires":[]},{"id":"e7ca3249.6ee4f","type":"mqtt-broker","name":"Orca Broker","broker":"mqtt.orcaroeien.nl","port":"1883","clientid":"Orca IOT","usetls":false,"compatmode":false,"keepalive":"60","cleansession":true,"birthTopic":"","birthQos":"0","birthPayload":"","closeTopic":"","closeQos":"0","closePayload":"","willTopic":"","willQos":"0","willPayload":""}]
Result
The final product is a fully functional, full-size smart traffic light that can display rowing ban status, show animations, and be controlled both manually and remotely.